In this guide, I will explain the process to export users with Custom security attributes using PowerShell. In my previous blog posts, we discussed Creating and Assigning Custom Security attributes to Entra ID users using Entra admin center and assigning Custom Security Attributes to users using PowerShell. This post is about exporting custom security attributes using PowerShell.
To get started on custom security attributes, I will recommend you to read this blog post first. The post details about what are custom security attributes and advantages of using it.
This blog post primarily focuses on exporting a list of Entra ID users with Custom security attributes assigned to them. It is assumed that you have already completed the steps to create and assign custom security attributes to the Entra ID users as a prerequisite.
Contents
Permissions Required for Managing Custom Security Attributes
To manage custom security attributes in Entra ID, you would require Attribute Definition Administrator or Attribute Assignment Administrator roles. By default, Global Administrator and any other administrator role do not have permission to read, define, or assign custom security attributes.
A Global Administrator can assign the roles of Attribute Definition Administrator or Attribute Assignment Administrator to a user responsible for managing custom security attributes, and this user could also be another Global Administrator.
- Attribute Definition Administrator – Manage all aspects of attribute sets and Manage all aspects of custom security attribute definitions
- Attribute Assignment Administrator – Read attribute sets, Read custom security attribute definitions, and Read and update custom security attribute keys and values for users and service principals.
Export Users with Custom security attributes using PowerShell
First, you must connect to Microsoft Graph using the Connect-MgGraph cmdlet. Subsequently, you can utilize the Get-MgUser cmdlet to retrieve the custom security attributes assigned to the users. Below are the values you’ll require for the PowerShell script:
Below are the values you will require for the PowerShell script: (Replace the values with those specific to your organization accordingly).
- Attribute Set Name: The name of the Attribute set. For example, CostCenter
- Attribute Names: All the attributes under the attribute set CostCenter, such as CloudInfra, Techpress, etc., which we will define in an array.
Connect to Microsoft Graph
Connect-Mggraph -scopes "User.ReadWrite.All,Directory.ReadWrite.All,CustomSecAttributeAssignment.ReadWrite.All,CustomSecAttributeDefinition.ReadWrite.All"

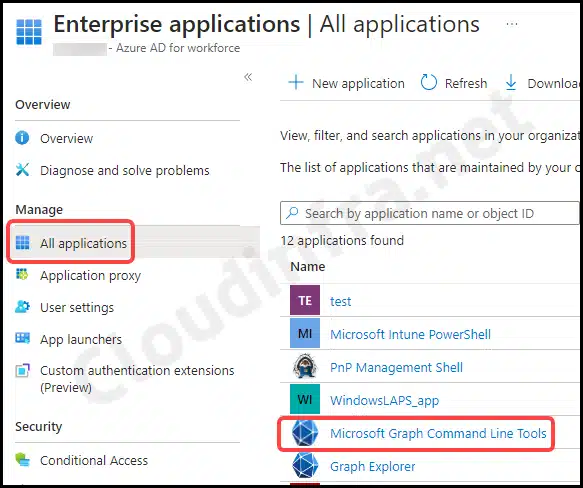
You might get a prompt to provide consent and accept the required permissions. Please consent and click on Accept. This action will create an Enterprise Application in Entra ID. To access it, navigate to the Entra Admin Center, then go to Identity > Applications > Enterprise applications.
- Click on Microsoft Graph Command Line Tools.
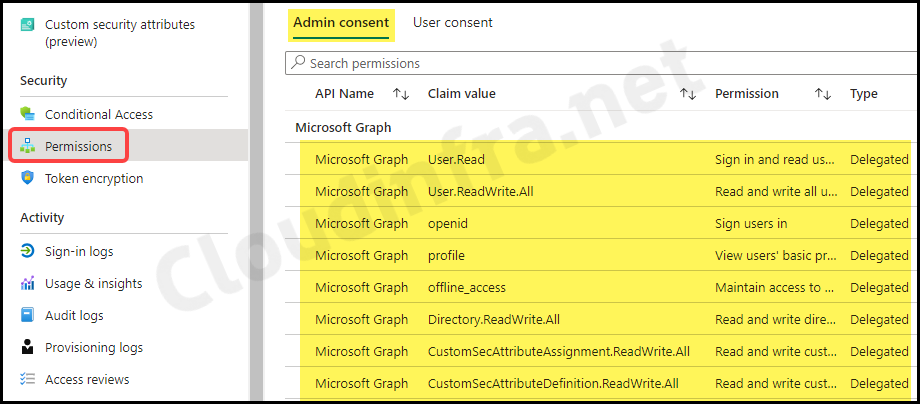
- After clicking on the application, scroll down to Permissions under the Security section. Here, you’ll find a list of all the permissions that you’ve consented to using
Connect-MgGraph.
- After successfully connecting to Microsoft Graph using the provided scopes, you can export the list of users using the following PowerShell script.
- You can use the PowerShell script below to Export users with their Custom Security Attributes.
Export-CustomSecurityAttributes.ps1
<#
.DESCRIPTION
    This script Export the users having CostCenter Attribute
    Author: Jatin Makhija
    Site: cloudinfra.net
    Version: 1.0.0
#>
#Provide all Custom security Attributes in an Array
$CSA = @('CloudInfra', 'TechPress')
#Initialize an empty array
$Users = @()
$Users = Get-MgUser -All -Property CustomSecurityAttributes, Id, DisplayName
$object = ForEach ($User in $Users) {
    If ($User.customsecurityattributes.AdditionalProperties['CostCenter'] -ne $Null) {
        $data = $User.customsecurityattributes.AdditionalProperties['CostCenter']
        $value = $data.keys | foreach-object {if ($_ -in $CSA) {$data[$_]}}
         [PSCustomobject]@{
         Name = $User.DisplayName
         CostCenterCode = $value
         }
     }
 }
 $object | Export-Csv c:\temp\CloudinfraUsers.csv -NoTypeInformation
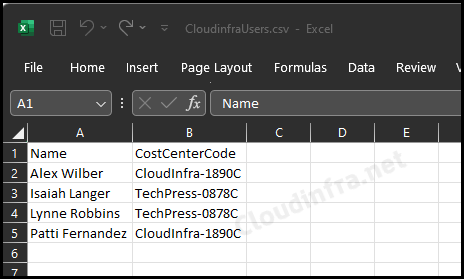
- Let’s check the contents of the CloudInfraUsers.csv file. It has two columns: Name and CostCenterCode. This is the custom security attribute we applied to the users.
Conclusion
In this blog post, we’ve explored the process of exporting a list of users with custom security attributes. The data is exported in a CSV file that can be re-formatted according to your requirements.