In this guide, I will walk you through the steps to block an email address or domain in Exchange Online. Blocking a malicious or unwanted sender is a common requirement for maintaining a secure and well-managed email environment. You can either use Exchange Online admin center or PowerShell to create a mail flow rule for blocking a sender or domain.
Microsoft’s recommended approach is to use the Tenant Allow/Block List (TABL) in the Microsoft Defender portal. TABL operates at the service level and is enforced early in the mail flow, making it more reliable than user-level or policy-based blocking methods. It also provides centralized management, clear visibility, and consistent enforcement across the tenant, which makes it the preferred option for blocking known malicious senders or domains.
Contents
Block a Domain using Exchange Online Mail Flow Rule
In the next steps, we will create a mail flow rule in Exchange Online to block a domain. Instead of domain, you can also enter the sender’s email address as well.
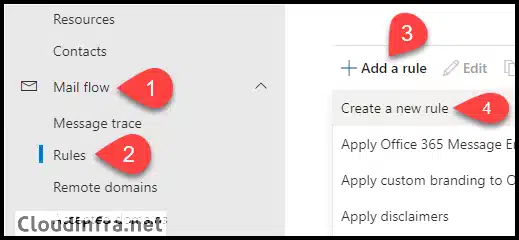
- Open Exchange Online admin center > Mail Flow > Rules > Click on + Add a rule > Create a new rule.
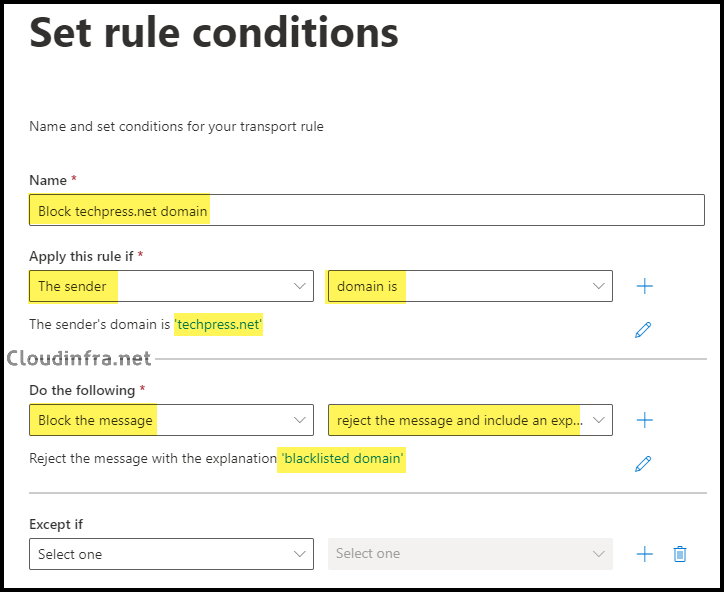
- On the Set rule conditions pane, define the conditions under which you want to block the domain or sender.
Rule configuration example:
- Name: Bypass <domainname> domain from spam filtering
- Apply this rule if:
- The sender domain is <domain name>.
- Do the following:
- Block this message and select reject the message and include an explanation.
- Explanation: blacklisted domain
- Block this message and select reject the message and include an explanation.
- Configure the following rule settings and then click Next.
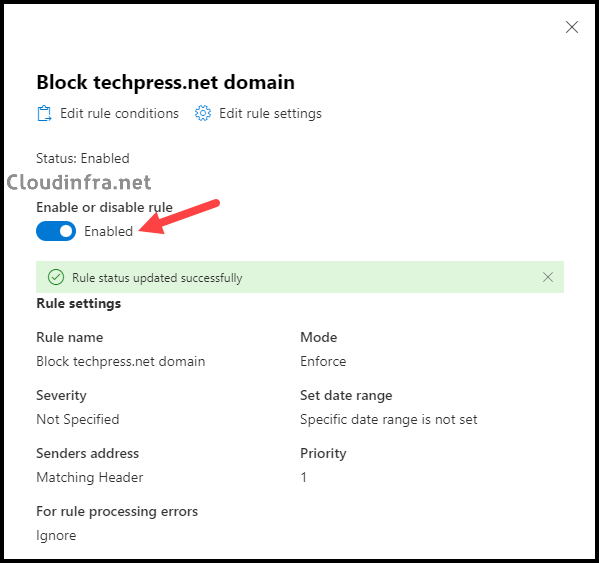
- Rule mode: Enforce.
- Keep all other settings at their default values.
- Review and click on Finish to create the rule.
- When you create a rule in Exchange Online, it is initially set to a disabled state by default. To activate the rule, click on the rule and switch it to Enable.
Testing Mail Flow Rule Created in the Previous Step
We have now created and enabled a mail flow rule in Exchange Online for our organization to block emails originating from the example domain techpress.net. Let’s validate this rule by sending a test email from techpress.net to cloudinfra.net and reviewing the outcome.
- Sender email address: GradyA@techpress.net
- Recipient email address: AlexW@cloudinfra.net
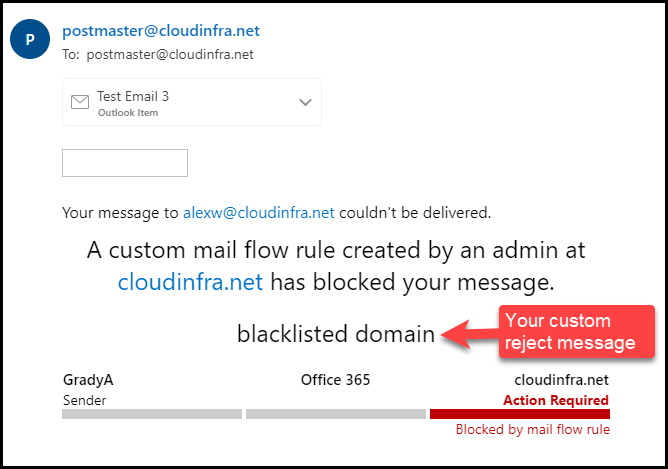
After sending the message, the sender receives a Non-Delivery Report (NDR) from postmaster@cloudinfra.net. The NDR confirms that a custom mail flow rule created by an administrator in cloudinfra.net has blocked the message. It also includes the rejection explanation configured in the rule, which in this case is “Blacklisted domain.” This rejection message can be customized or left blank based on your requirements.
The message rejection status code shown in the NDR is:
Status code: 550 5.7.1_ETR. 550 5.7.1 TRANSPORT.RULES.RejectMessage; the message was rejected by organization policy
This confirms that the mail flow rule is working as expected and is actively blocking emails from the specified domain.
Create a Mail Flow Rule to Block a Domain Using PowerShell
Alternatively, you can also use PowerShell commands to create a mail flow rule for blocking a domain in Exchange Online. The cmdlet you can use for this purpose is New-TransportRule. Before you can run this cmdlet, ensure that you have installed Exchange Online PowerShell module on your system.
Install Exchange Online PowerShell module
Install-Module ExchangeOnlineManagement
Connect to Exchange Online
Connect-ExchangeOnline
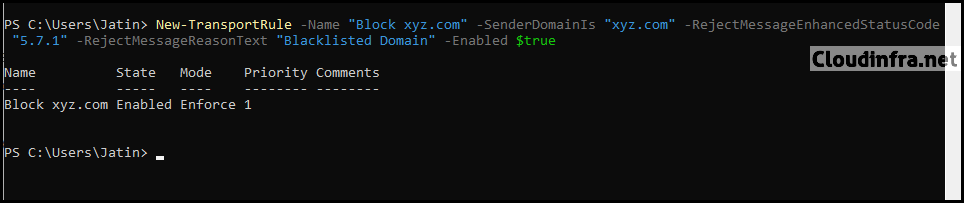
Create a new mail flow rule to block xyz.com
New-TransportRule -Name "Block xyz.com" -SenderDomainIs "xyz.com" -RejectMessageEnhancedStatusCode "5.7.1" -RejectMessageReasonText "Blacklisted Domain" -Enabled $true
You can further customize the behavior of the New-TransportRule cmdlet by exploring various additional parameters. One useful parameter is -Priority, which allows you to define the rule’s precedence over other rules. For example, if you want to ensure your block domain rule takes precedence, you can assign it a higher priority by setting a lower numerical value, such as -Priority 0. This ensures that it’s processed before other rules in the sequence.
Creating a rule with -Priority 0
New-TransportRule -Name "Block xyz.com" -Priority 0 -Enabled $true -SenderDomainIs xyz.com -RejectMessageEnhancedStatusCode "5.7.1" -RejectMessageReasonText "Blacklisted Domain"
Conclusion
In this blog post, we explored the steps for creating a rule in Exchange Online to block a sender’s email address or domain. You can also create the same rule by using PowerShell as well. While I have used a limited set of parameters with the New-TransportRule cmdlet, you can further customize your rules by leveraging additional parameters, such as -Comments, to add meaningful context to each rule.