In this blog post, I will show you the steps to create registry keys using Intune Win32 app on Windows 10/11. For this task and demonstration purpose, we will use Win32 app deployment method to deploy a registry key and its entries in HKLM registry node. Please note, this method will also work for deploying registry key and entries in HKCU registry node as well.
HKCU is a short form of HKEY_CURRENT_USER. It contains the configuration information for the user who is currently logged on. The user’s folders, screen colors, and Control Panel settings are stored here. This information is associated with the user’s profile.
You can either use Win32 app method or Intune device remediations for deploying registry keys and values in HKCU node. Win32 app method is shown in this blog post and for Intune device remediations method, please refer to the link: Create HKCU registry keys using Intune remediations.
About HKCU registry node
HKLM is an abbreviation for HKEY_LOCAL_MACHINE, which stores information related to the operating system and application configuration settings. In this blog post, I’ve utilized the Win32 app deployment method to deploy HKLM registry keys and entries. You can also create registry keys and values using Intune device remediations; please refer to the link for more information: Create Registry keys using Intune remediations.
About HKLM registry node
Below are some scenarios when you might need to create registry key and entries on the Windows devices:
- Post-deployment application configuration: After installing software, you can use registry keys to configure and customize the application settings to suit your specific needs.
- License configuration or activation: Registry keys can manage software licenses and activation for various installed applications.
- Operating system configuration settings: You can deploy registry keys to adjust and fine-tune operating system settings to align with your requirements.
- Enabling or disabling application features: Registry keys can enable or disable specific features within applications, allowing you to tailor the software’s functionality to your preferences.
Contents
Step 1: Export Registry Key and Entries
First we need to create the registry key and values on any Windows 10/11 device, exactly as you want to see on the target devices when deployed via Intune, and export it into a .reg file.
- On any Windows 10/11 device, Open Registry Editor.
- Create the registry keys that match your desired configuration on the target devices.
- Export the key and values into .reg file.
- For Example:
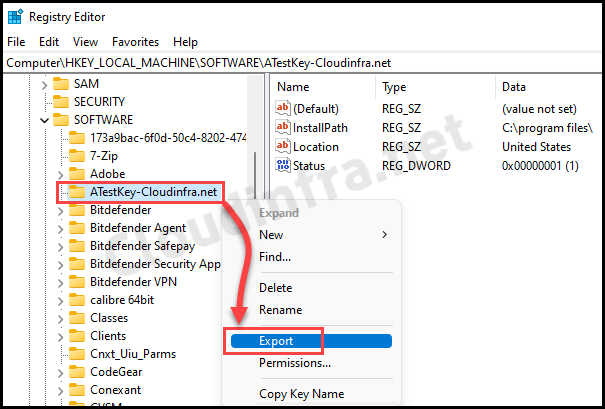
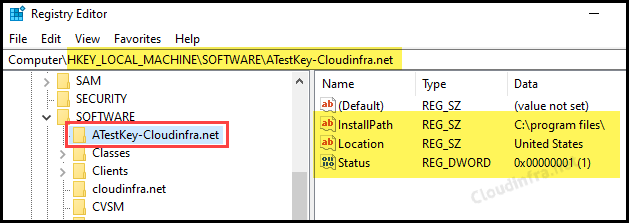
- For demonstration purposes, I’ve created a registry key named ATestKey-Cloudinfra.net within the HKEY_LOCAL_MACHINE\SOFTWARE path and added a few DWORD and String-type registry entries.
- To export the registry key, right-click on it and then choose the Export option.
- Provide file name and Save it. It will be saved with the file extension .reg.
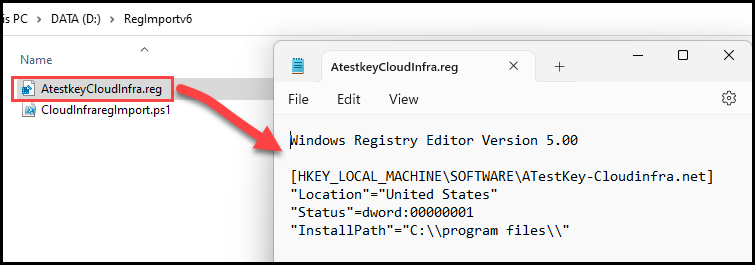
- Below screenshot shows, AtestkeyCloudinfra.reg file exported and its contents.
Step 2: Create an IntuneWin file
The next step is to create an Intunewin file. Let’s check the steps:
- Create a PowerShell script using below code. Replace the .reg file name with your exported .reg file name. Save the script file with .ps1 extension.
CloudInfraregImport.ps1
reg import .\AtestkeyCloudInfra.reg
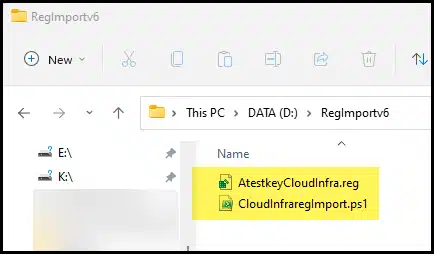
- Create an empty folder anywhere on your device and place the registry export file (.reg file) and powerShell script file into this folder.
- Download Microsoft Win32 Content Prep Tool. It’s a zip file; therefore, extract its contents into a folder.
- Create an empty folder, for example, C:\output or anywhere else.
- Use the below command to create a .intunewin file. (For detailed guidance on .Intunewin file, refer to this link: How to create an Intunewin file).
Create Intunewin file
.\IntuneWinAppUtil.exe -c "D:\RegImportv6" -s CloudInfraRegImport.ps1 -o C:\output
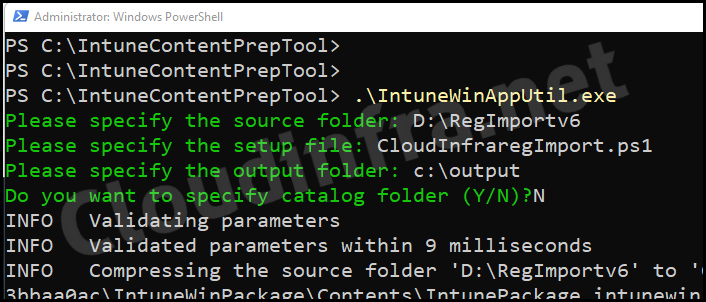
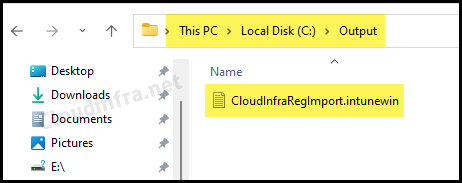
- Now, check C:\output folder to confirm whether .Intunewin file has been successfully created.
Step 3: Deploy the Registry Key using Win32 App
To deploy the registry keys and values, we would be creating a Win32 app on Intune admin center using the .intunewin file we generated in the previous step.
- Sign in to the Intune admin center > Apps and then click on All Apps.
- Click on + Add and Select Windows app (Win32) from the app type.
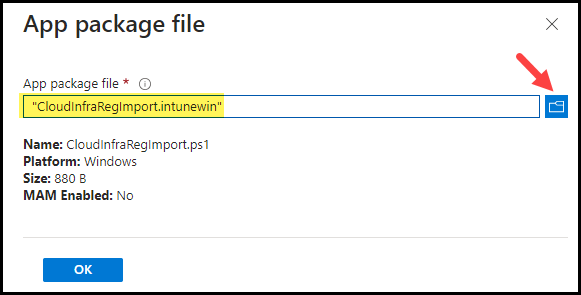
- App Information: Browse to CloudInfraRegImport.Intunewin file.
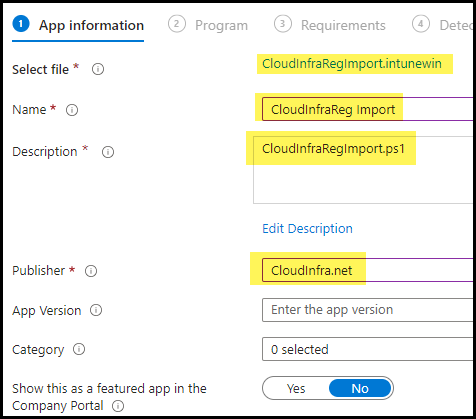
- Provide Name, Description, and Publisher Information.
- Name: CloudInfraReg Import
- Description: Keep the default, or to change it, click Edit Description.
- Publisher: Cloudinfra.net
- Program Tab: Configure program tab values as below:
- Install command: %windir%\sysnative\WindowsPowerShell\v1.0\powershell.exe -Executionpolicy Bypass .\CloudInfraregImport.ps1
- Uninstall command: %windir%\sysnative\WindowsPowerShell\v1.0\powershell.exe -ExecutionPolicy Bypass -Command “Remove-Item -Path ‘HKLM:\SOFTWARE\ATestKey-Cloudinfra.net’ -Force”
- Installation time required (mins): Specify how long your application would take to complete the Installation. If it takes longer than the specified time, the Installation will fail. The default time is 60 minutes; the maximum time you can specify is 1 day (1440 minutes).
- Install behavior: System
- Device restart behavior: No specific Action
Select Install behavior as User when you have exported the registry keys from HKCU node and deploying it on HKCU registry node on target device.
For deploying registry keys in HKCU registry node

- Requirements Tab: You can specify the requirements that devices must meet to deploy the app. If your devices mix 32-bit and 64-bit types, check the boxes for 32-bit and 64-bit in the operating system architecture drop-down. Else, go with 64-bit.
- Operating System Architecture: 64-bit
- Minimum operating system: Select the minimum OS requirement for this deployment.
- Detection Rules: Select Manually configure detection rules and click on +Add to add a detection rule.
- Rules Format: Select Manually configure detection rules
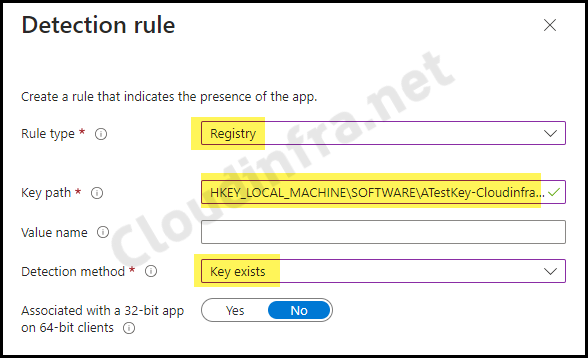
- Rule Type: Registry
- Key path: HKEY_LOCAL_MACHINE\SOFTWARE\ATestKey-Cloudinfra.net
- Detection method: Key exists
- Associated with 32-bit app on 64-bit clients: No
- Assignments: Assign the policy to Entra security groups that contain the target users or devices. As a best practice, pilot with a small set first; once validated, roll it out more broadly. For guidance on assignment strategy, see Intune assignments: User groups vs. Device groups.
- Review + create: Review the deployment summary and click Create.
Sync Intune Policies
The device check-in process might not begin immediately. If you’re testing this policy on a test device, you can manually kickstart Intune sync from the device itself or remotely through the Intune admin center.
Alternatively, you can use PowerShell to force the Intune sync on Windows devices. Restarting the device is another way to trigger the Intune device check-in process.
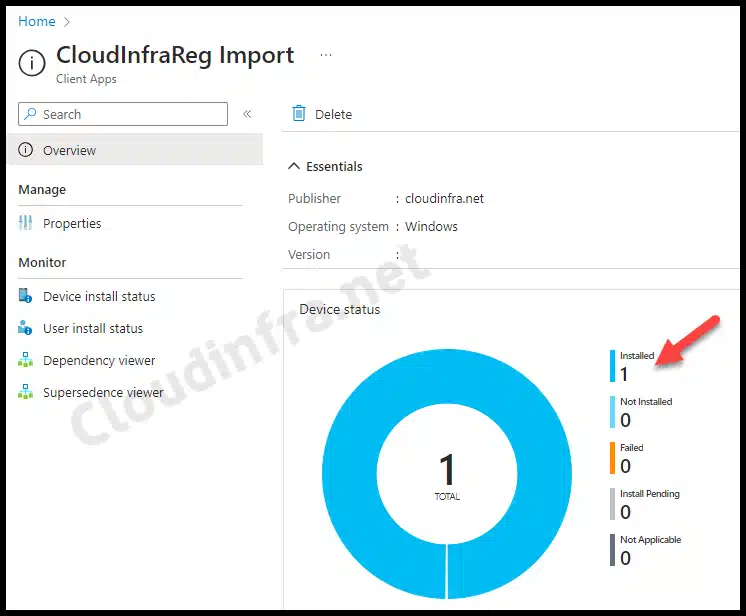
Monitoring the Deployment Progress
To check the Installation status of the app, You can follow the below steps:
- From the Intune admin center > Apps > All apps.
- Search for the app CloudInfraReg Import and click on it.
- Check the Overview page, Device install status and User install status page.
End User Experience
To confirm if the registry key and its entries are successfully imported, restart the target device and wait a few minutes for the PowerShell script to download and execute. You can then verify it by following these steps:
- Press Win Key + R to open the Run dialog box.
- Type regedit and press enter.
- Navigate to HKEY_LOCAL_MACHINE\SOFTWARE\ to find the registry key ATestKey-Cloudinfra.net and registry entries created.
Conclusion
In this blog post, we learnt how to create registry keys and values using the Intune Win32 App method. We deployed a registry key under the HKLM (HKEY_LOCAL_MACHINE) registry node. You can also use the Win32 App method to deploy registry keys under the HKCU (HKEY_CURRENT_USER) registry node.
You can also deploy a simple PowerShell script to deploy registry keys. Go to Devices > Scripts and remediations > Platform scripts on the Intune admin center for more information. Refer to this step-by-step guide: How to deploy Powershell script using Intune for more details.
Thx a lot. It was very helpful
May be worth pointing out that this method is probably the only way to push registry changes out if you dont have E3 – Eg if you have Microsoft Business Premium. (which is a SME licence for orgs of up to 300)
What about if the user does not have local admin rights and trying to write to HKCU? We don’t have E3 – only Business Premium.
If the user does not have admin rights, it won’t work as they cannot write to registry as a standard user. We need to take a different approach for writing in HKCU. I have explained it in another blog post and a script which can be run with admin rights to write to HKCU: https://cloudinfra.net/how-to-create-hkcu-registry-keys-using-intune-remediations/
Thank you very much!!
The “Install command: %windir%\sysnative\WindowsPowerShell\v1.0\powershell.exe -Executionpolicy Bypass…..” is what was messing me up