In this blog post, I will show you the steps on how to deploy Zoom using Intune. Zoom app is available in MSI format, therefore preferred mode of deployment for MSI apps would be Line-of-business app. Let’s explore the steps:
Contents
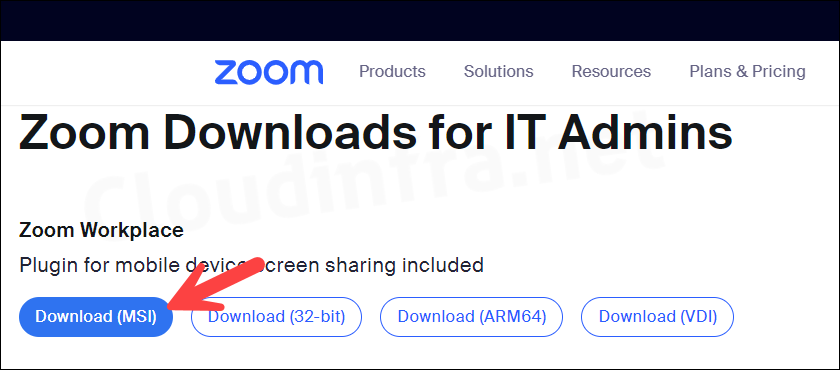
1. Download Zoom App
Download Zoom app MSI file from the Zoom Admin Page. Click on Download (MSI) button to download the latest Zoom app MSI file.
2. Create LOB App deployment for Zoom
Follow the below steps to create a Line-of-business app deployment for Zoom App:
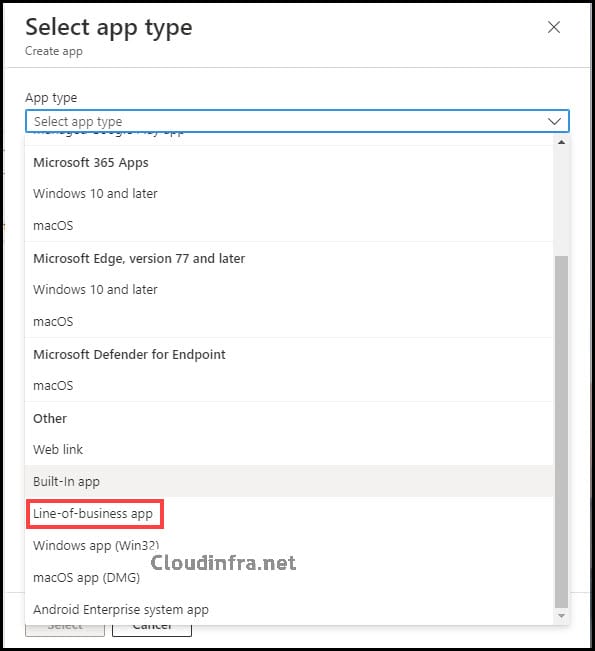
- Sign in to the Intune admin center > Apps > All apps.
- Click on + Add > Select App type as Line-of-business app.
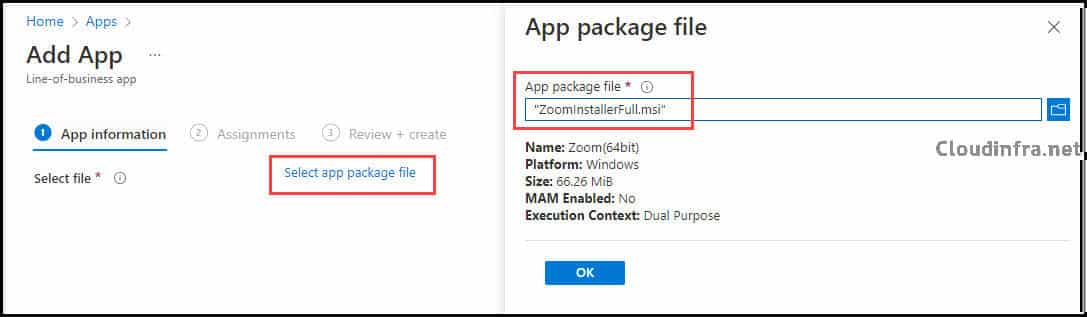
- Click on the app package file and browse for the Zoom MSI file. Click on the OK button to proceed.
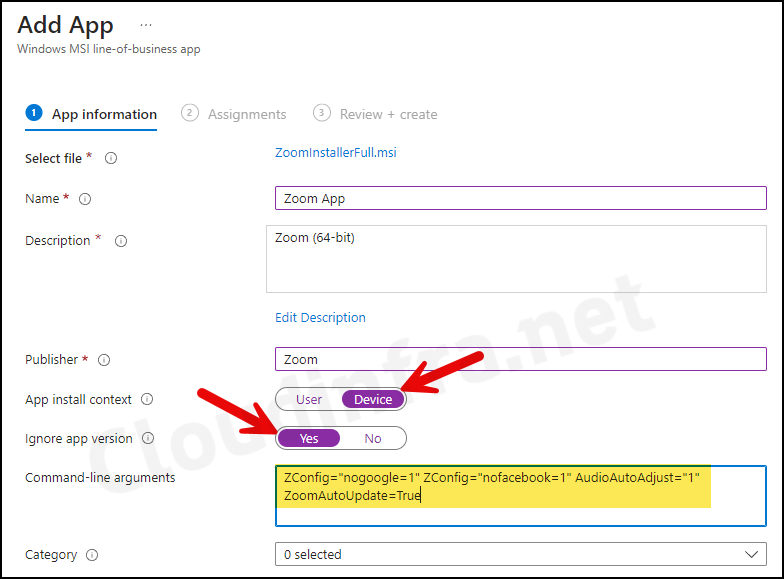
- App Information:
- Name: Enter the name of the application.
- Description: Enter the description of the application.
- Publisher: Enter the name of the app publisher.
- App install context: Select App install context as Device.
- Ignore App version: Yes [If you’re using ZoomAutoUpdate=true switch, set it to Yes; otherwise, keep it at No].
- Command-line arguments: Provide command-line arguments/switches to be executed with selected MSI.
ZConfig=”nogoogle=1″ ZConfig=”nofacebook=1″ AudioAutoAdjust=”1″ ZoomAutoUpdate=True
Command-line arguments configure certain features or settings for the Zoom App. I have provided information about some switches being used. For more details and a complete list of command-line switches, refer to this link: Zoom Mass deployment.
- ZConfig=”nogoogle=1″: It will disable the Google login method for the Zoom app.
- ZConfig=”nofacebook=1″: It will disable the Facebook login method for the Zoom app.
- AudioAutoAdjust=”1″: This will Auto-adjust audio to the auto setting. (Automatically adjusts noise suppression).
- ZoomAutoUpdate=True: This will ensure the Zoom app is updated automatically.
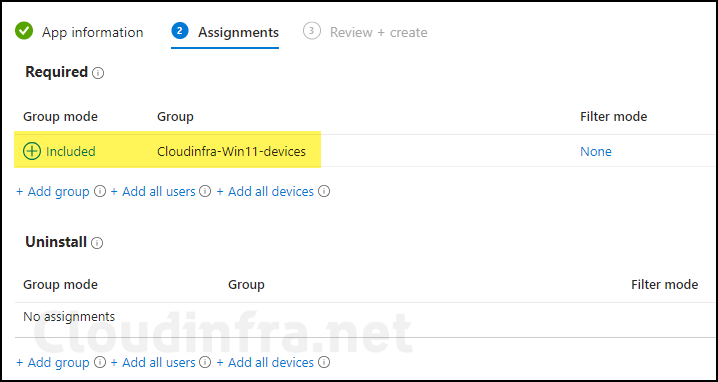
- Assignments: Under the Required assignments section, add an Entra security group containing Windows 10/11 devices.
You may have noticed that Available for enrolled devices option is missing. This is because we have selected the App Install context as Device. If you change App install context to users, you will be able to see the option Available for enrolled devices.
Note
- Review + create: Review the app deployment and click on Create to proceed.
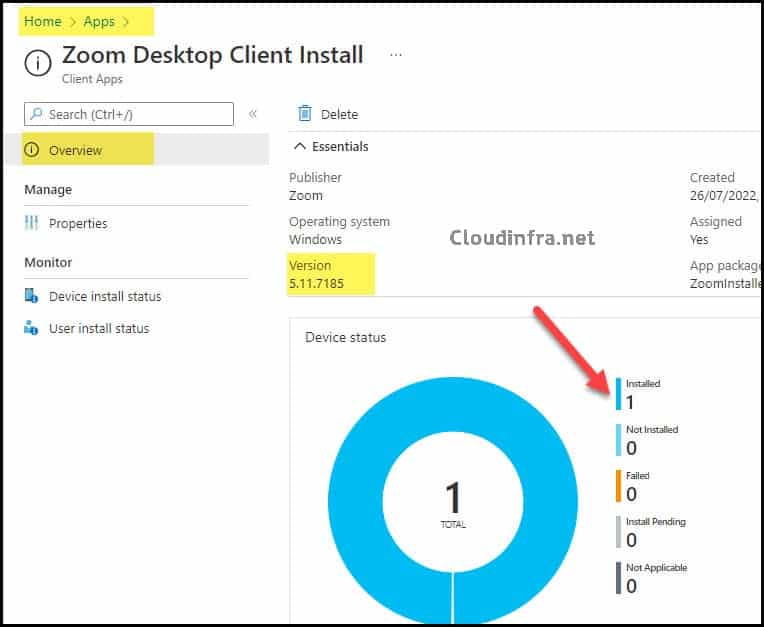
3. Monitoring Installation status
You can monitor the Installation of the Zoom app deployment directly from the Intune admin center. Please follow the below steps to check the status of the deployment.
- Open Zoom App deployment > Overview page.
- To learn more about the app deployment, click on Device install status or User install status under Monitor.
4. End User Experience
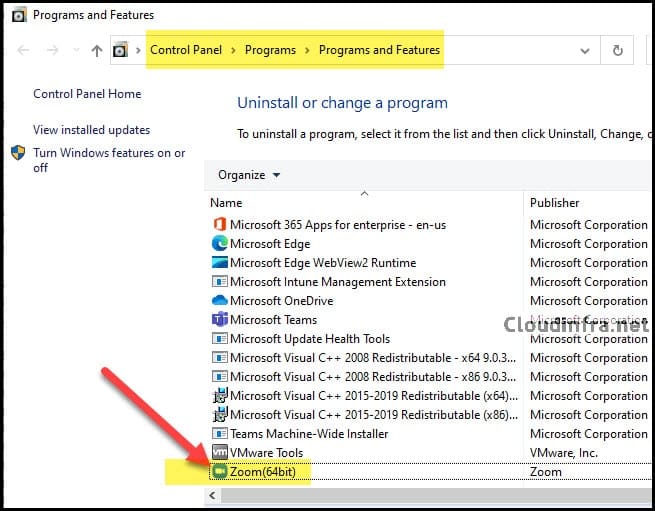
To check if the Zoom Application has been Installed Successfully, open Control Panel > Programs and Features to check and confirm the Zoom app installation.
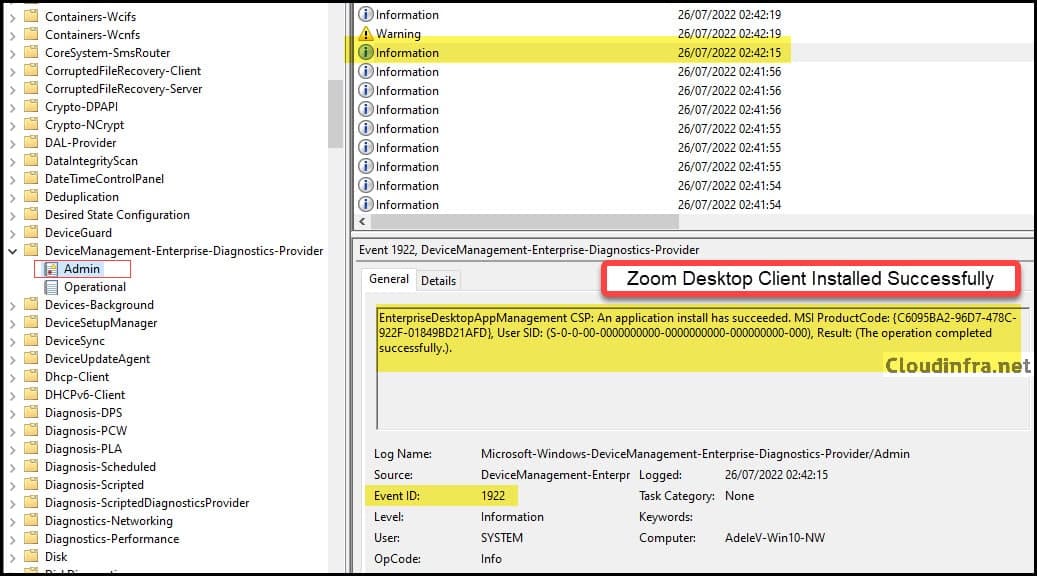
Zoom App Installation Status Using Event Viewer
Using Event viewer on the target device, you can also confirm if the Zoom application has been installed successfully. Sign in on one of the target device and follow below steps:
- Start > Search for Event Viewer and click on it to Launch Event Viewer MMC.
- Expand Application and Services logs > Microsoft > Windows.
- Find DeviceManagement-Enterprise-Diagnostics-Provider folder.
- Click on Admin and review the logs to find the specific policy or application deployment status.
You can check recent event logs in Admin Events and search for logs related to your deployment. You can verify the application using the MSI ProductCode: C6095BA2-96D7-478C-922F-01849BD21AFD, which belongs to the Zoom desktop client app, and Event ID: 1922.
| EnterpriseDesktopAppManagement CSP: An application install has succeeded. MSI ProductCode: {C6095BA2-96D7-478C-922F-01849BD21AFD}, User SID: (S-0-0-00-0000000000-0000000000-000000000-000), Result: (The operation completed successfully.). |
FAQs
How to Uninstall Zoom app using Intune?
I have created a step-by-step guide that provides all the steps to Uninstall the Zoom App from user’s devices. Please refer to the link:
How to Uninstall Zoom using Intune.
How do you verify the Zoom AutoUpdate setting from the Registry?
– Press the Windows + R keys to open the Run dialog box.
– Type regedit and press Enter to open Registry Editor.
– Navigate to HKEY_LOCAL_MACHINE\SOFTWARE\ZoomUMX\PerInstall
– Check the enableupdate registry entry, which should be set to true.
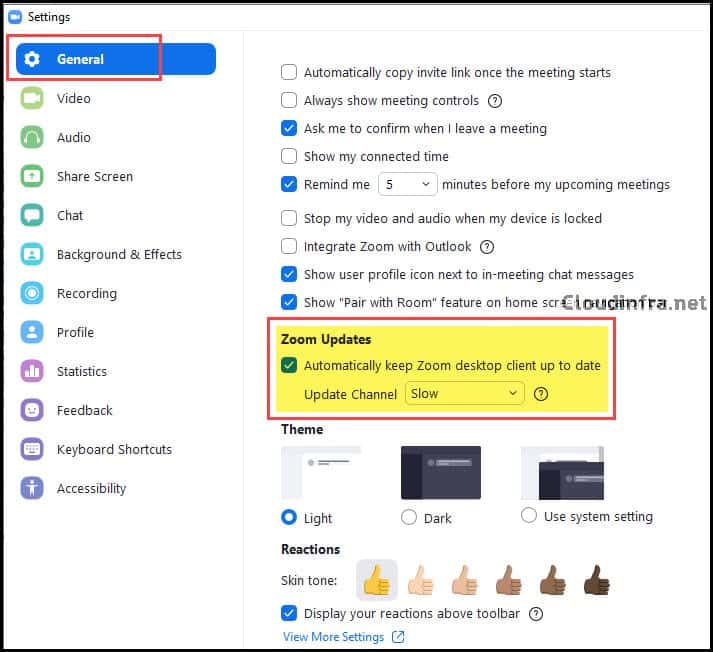
How do you verify the Zoom AutoUpdate setting using the Zoom App?
– Login to the Zoom App > Settings > General.
– Scroll down to find Zoom Updates section.
– Automatically keep Zoom Desktop Client up to date should be selected.
[You can also refer to the below screenshots to locate this setting]
How to manage Zoom AutoUpdate setting using Intune?
Instead of using Command-line switches to configure AutoUpdate=true, you can also Import Zoom ADMX into the Intune admin center and manage this setting centrally across all the managed devices.
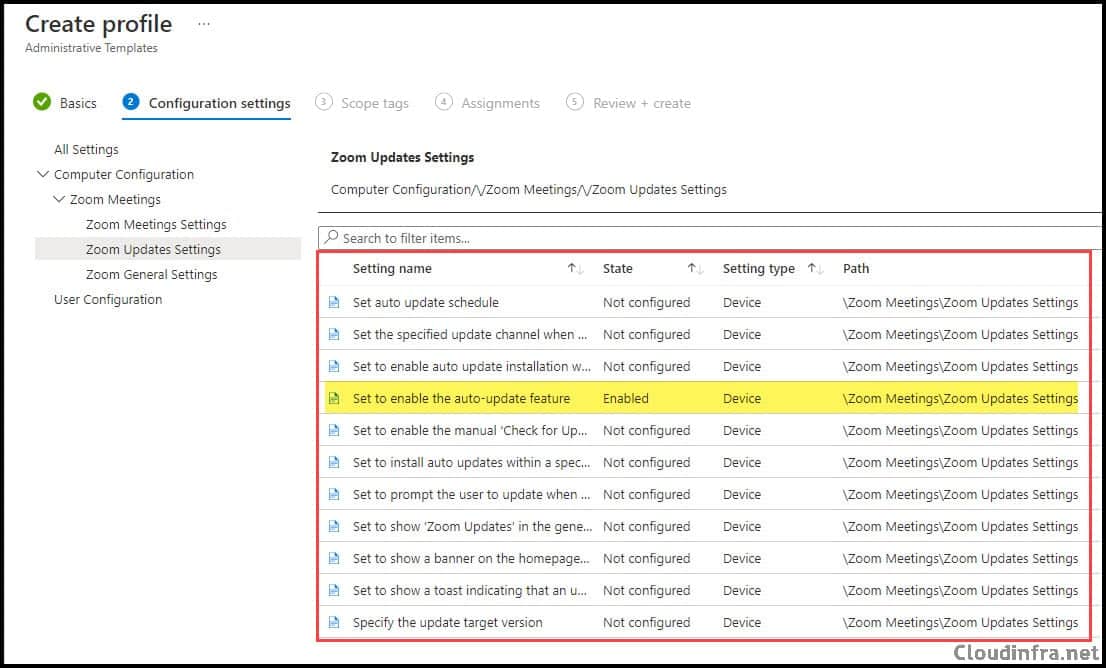
To Configure Zoom AutoUpdate setting using a Device configuration profile, please follow below steps:
– Intune admin center > Devices > Configuration > Create > New Policy
– Platform: Windows 10 and later and Select Profile type as Templates
– Template name: Import Administrative templates
Under All settings, search for the setting Set to enable the auto-update feature and select Enable. You can then apply this device configuration profile to an Entra security group containing devices.
I thought the command line argument ZoomAutoUpdate=true isn’t supported anymore?
The Zoom Support website still lists ZoomAutoUpdate parameter, indicating that it is still a supported switch. If you prefer not to use this switch for Zoom MSI deployment via Intune, you have the option to manage Zoom Auto Update using ADMX files.
Refer to this guide for Importing and managing Zoom settings: https://cloudinfra.net/how-to-import-admx-templates-into-intune/
Zoom Support Page provides information about ZoomAutoUpdate Switch:
https://support.zoom.com/hc/en/article?id=zm_kb&sysparm_article=KB0064484
msiexec /i “ZoomInstallerFull.msi” /quiet /qn /norestart zConfig=”nogoogle=1;nofacebook=;AU2_EnableAutoUpdate=1″ ZRecommend=”AudioAutoAdjust=1″