In this blog post, I will show you the steps to manage Windows defender firewall using Intune. Refer to the guide: Creating custom Windows Defender firewall rules if you want to create defender firewall rules using Intune.
To protect organization devices, we want to ensure that the defender firewall is switched on and cannot be turned off by users. Therefore, we will create a Windows defender firewall profile and assign it to Windows devices. Let’s take a look.
Contents
Ways to manage Windows Defender Firewall
You have different ways of managing Windows Defender Firewall. Please find below:
- Using Intune admin center > Endpoint Security > Firewall.
- By creating a Device configuration profile.
- By creating Microsoft Defender for Endpoint Baseline under Endpoint Security.
Devices with Windows Defender Firewall Switched Off
You can find all devices where the Windows Defender firewall is switched off from Intune admin center > Endpoint Security > Firewall. Click on MDM devices running Windows 10 or later with firewall off.

Create a Windows Defender Firewall Policy
To create a Windows Defender firewall policy, follow the below steps:
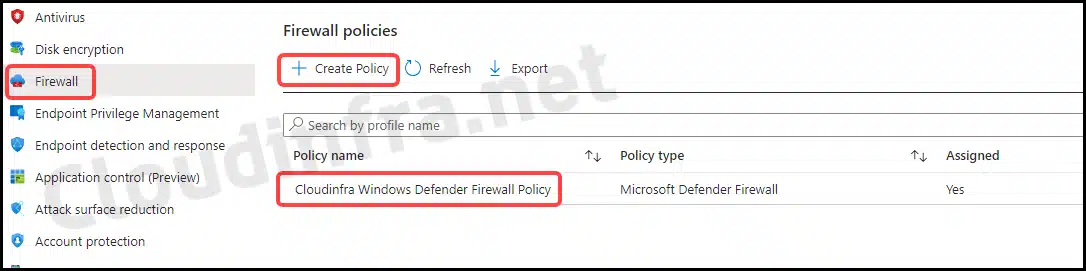
- Sign in to the Intune admin center > Endpoint Security > Firewall.
- Click on + Create Policy to create a new Firewall Policy.
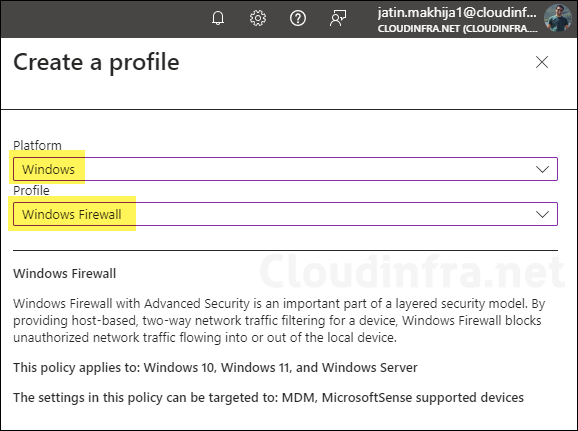
- Platform: Windows
- Profile: Windows Firewall.
- Click on Create to create this policy.
- Basics: Provide a Name and Description of the Policy.
- Configuration Settings: You can configure the Global settings for the firewall, which are at the top of the list. Then, configure the Domain, Private, and Public profiles as per your requirement. For example, below are the most basic firewall settings I have configured.
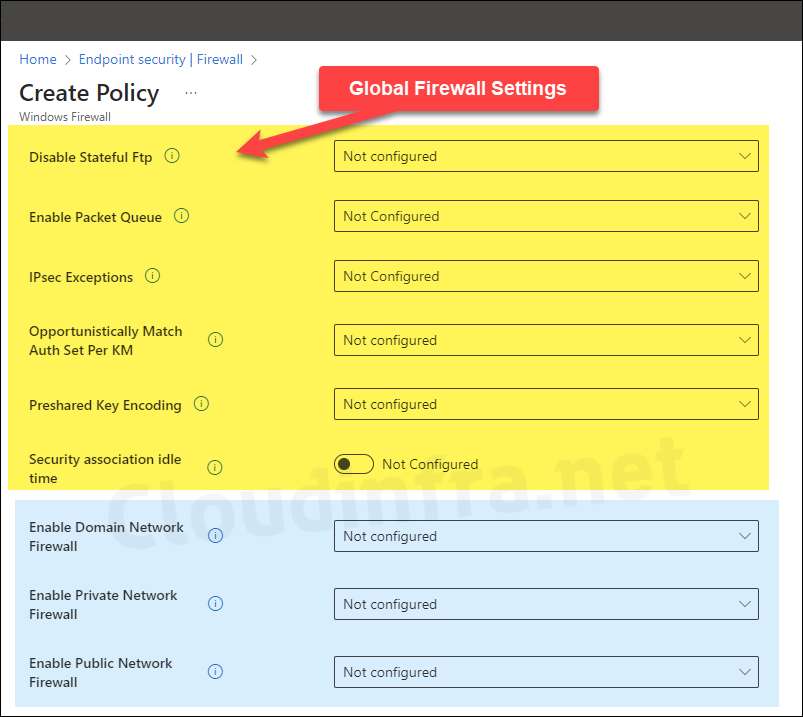
- Domain Profile Settings
- Enable Domain Network Firewall: True
- Default Inbound Action for Domain Profile: Block
- Default Outbound Action: Allow
- Private Profile Settings
- Enable Private Network Firewall: True
- Default Inbound Action for Domain Profile: Block
- Default Outbound Action: Allow
- Public Profile Settings
- Enable Public Network Firewall: True
- Default Inbound Action for Domain Profile: Block
- Default Outbound Action: Allow
- Auditing Settings
- Object Access Audit Filtering Platform Connection: Success + Failure
- Object Access Audit Filtering Platform Packet Drop: Success + Failure
- Scope tags (optional): A scope tag in Intune is an RBAC label you add to resources (policies, apps, devices) to limit which admins can see and manage them. For more Information, read: How to use Scope tags in Intune.
- Assignments: Assign the policy to Entra security groups that contain the target users or devices. As a best practice, pilot with a small set first; once validated, roll it out more broadly. For guidance on assignment strategy, see Intune assignments: User groups vs. Device groups.
- Review + create: Review the deployment summary and click Create.
End User Experience
Let’s check and confirm policy deployment on one of the target devices.
- Go to Start > Search for Windows Security App.
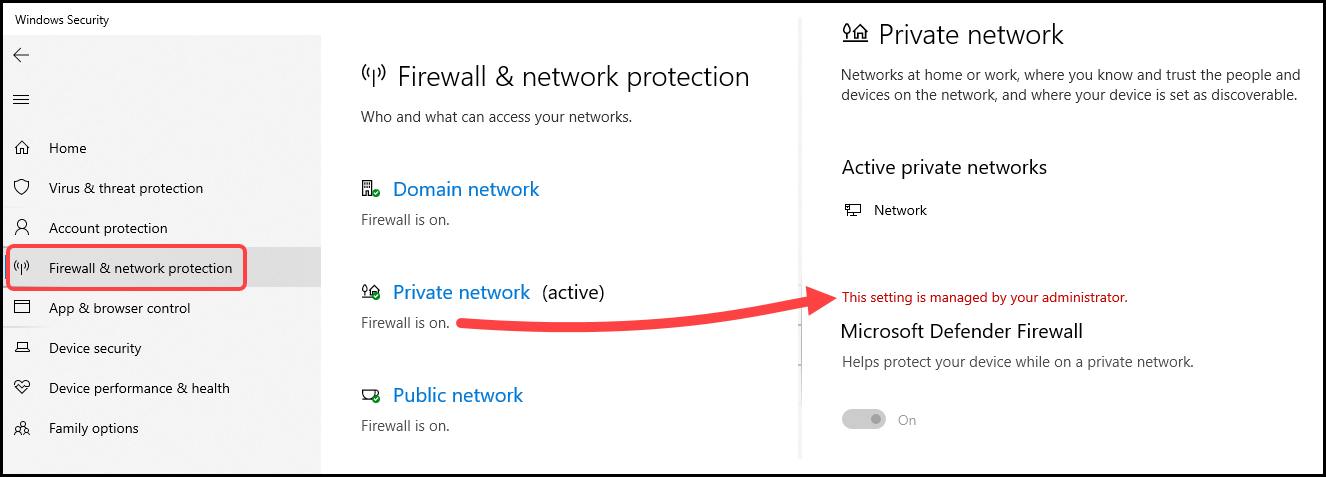
- Click on Firewall & network protection on the left-hand side.
- You can find the status of Domain, Private, and Public firewall.
- You can click on the link for each profile to get more information. For example, click Private network and check for more information about the private network profile.
- As you can see in the screenshot below, the Private network Firewall profile is switched on and managed by Intune.
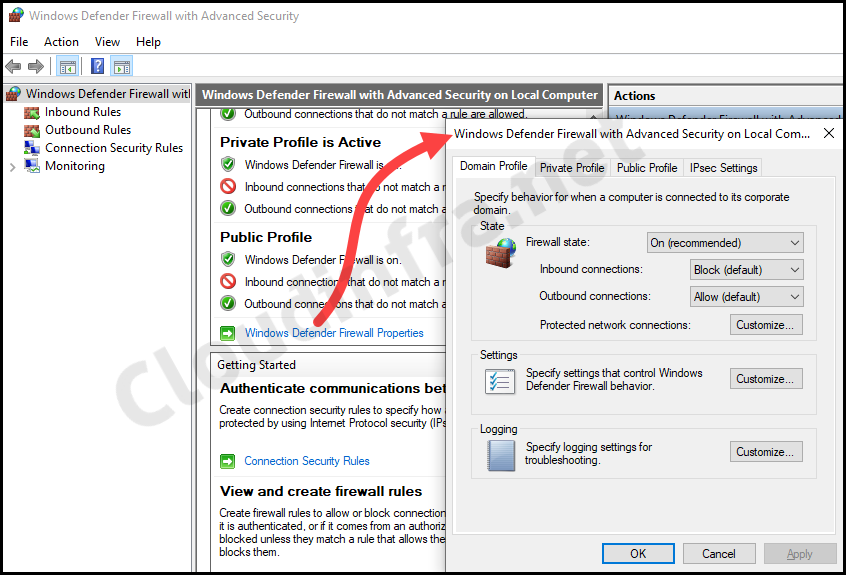
Verify Windows Defender Firewall using Advanced Settings
To verify Windows Defender Firewall status using its advanced settings, follow the below steps:
- Press Windows + R to open the Run dialog box.
- Type
wf.mscand press Enter. - Click on Windows Defender Firewall Properties.
- A pop-up will open where you can check the configuration of each Firewall Profile.
Manage Windows Defender Firewall using OMA-URI
You can also manage Windows Defender Firewall using OMA-URI settings. To learn more about Firewall CSP Settings, click on the link Firewall CSP. If you want to create a specific custom Windows Defender Firewall rule, refer to the post Create Windows Defender firewall rules using Intune.