In this blog post, we will see how to rename built-in administrator account using Intune on Windows 10/11 devices. Windows computers have an Administrator account (SID S-1-5-domain-500, display name Administrator). It is the first account created during the Windows installation.
Administrator account has full control of the files, directories, services, and other resources on the local device. Default Administrator account can’t be deleted or locked out, but it can be renamed or disabled. It can’t be removed from the Administrators group.
The best practice is to use a non-administrator account to log on to the PC and elevate to an administrator account when required, e.g., to install any applications or perform any configuration tasks on your device.
If you are using Windows LAPS to manage the built-in Administrator account, It must be enabled before you can deploy the LAPS policy to the device. You have the option to rename this account to a more user-friendly name and manage it using Windows LAPS.
If you do not intend to use the built-in local admin account, then you can rename the account and disable it to improve the security of Windows device.
Contents
Rename Built-in Administrator Account
- Sign in to the Intune admin center > Devices > Configuration > Create > New Policy.
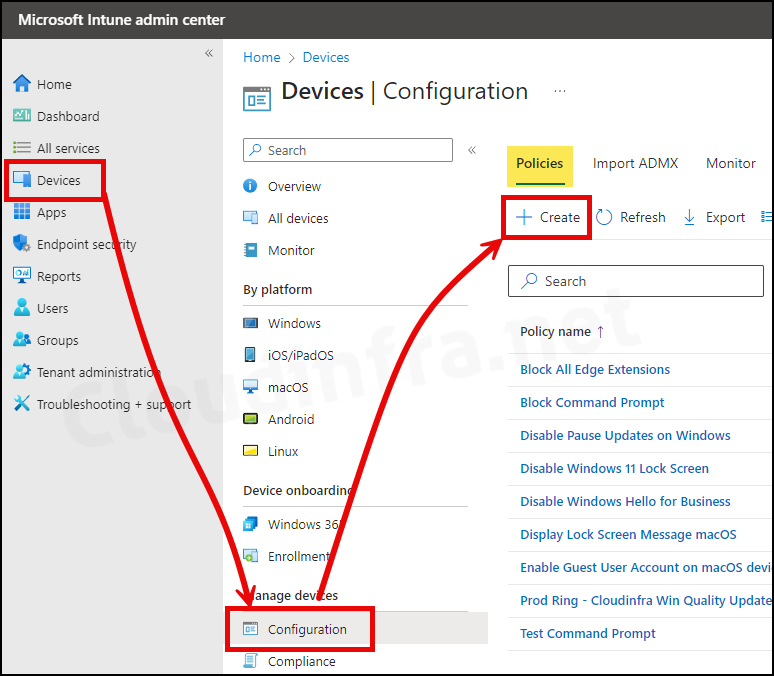
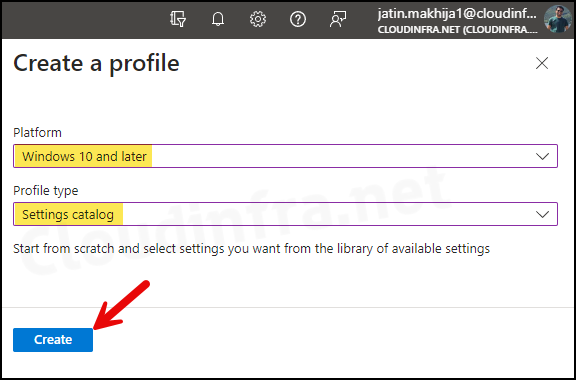
- Select Platform as Windows 10 and later
- Profile type as Settings Catalog
- Click on the Create button.
- Basics Tab: Enter the Name and Description of the profile.
- Configuration Settings:
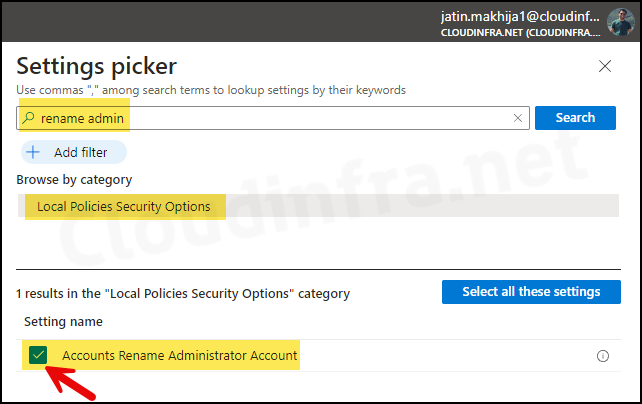
- Click on + Add settings.
- In the Settings picker, search for rename admin.
- Under the Category Local Policy Security Options, Select Accounts Rename Administrator Account.
Accounts: Rename administrator account This security setting determines whether a different account name is associated with the security identifier (SID) for the account Administrator. Renaming the well-known Administrator account makes it slightly more difficult for unauthorized persons to guess this privileged user name and password combination. Default: Administrator.
About Accounts Rename Administrator Account Policy setting
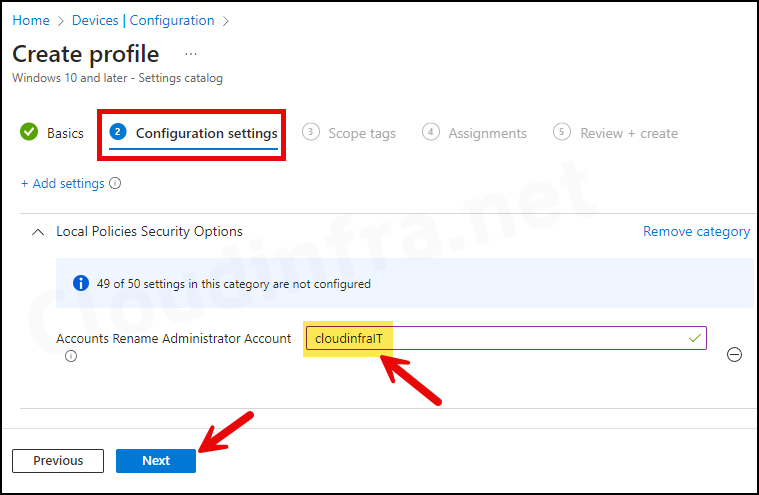
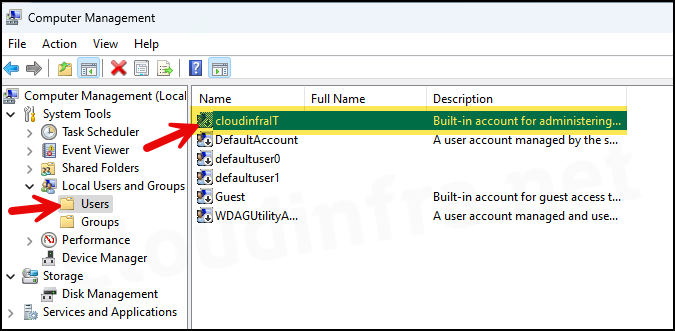
- You can rename built-in local administrator account using the Accounts Rename Administrator Account setting. As seen in below screenshot, I have set Administrator account name to cloudinfraIT. Once the Intune policy is successfully applied, the built-in administrator account will be renamed to cloudinfraIT.
- Scope tags (optional): A scope tag in Intune is an RBAC label you add to resources (policies, apps, devices) to limit which admins can see and manage them. For more Information, read: How to use Scope tags in Intune.
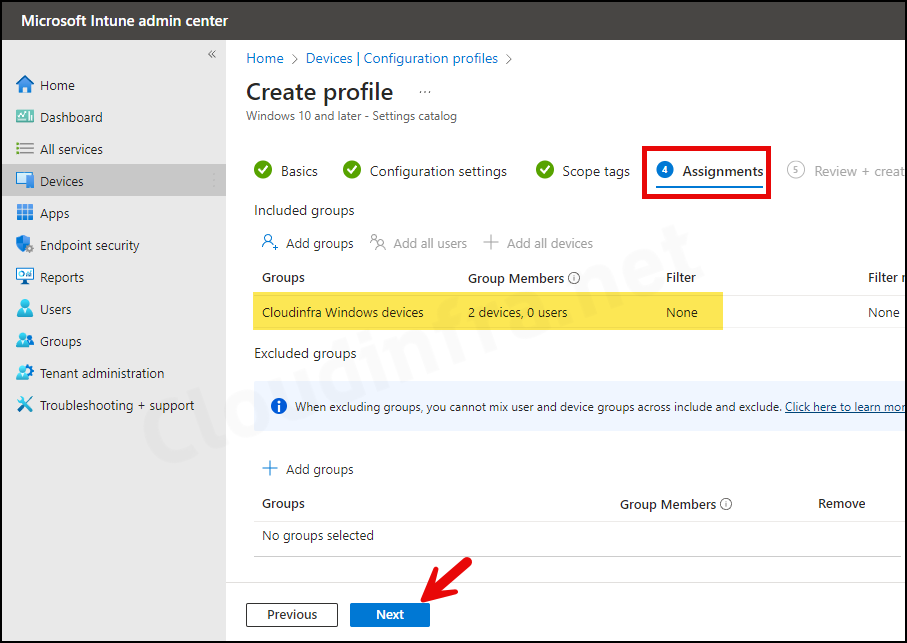
- Assignments: Assign the policy to Entra security groups that contain the target users or devices. As a best practice, pilot with a small set first; once validated, roll it out more broadly. For guidance on assignment strategy, see Intune assignments: User groups vs. Device groups.
- Review + create: Review the policy summary and click on Create.
Sync Intune Policies
The device check-in process might not begin immediately. If you’re testing this policy on a test device, you can manually kickstart Intune sync from the device itself or remotely through the Intune admin center.
Alternatively, you can use PowerShell to force the Intune sync on Windows devices. Restarting the device is another way to trigger the Intune device check-in process.
Monitoring Deployment Progress
- Sign in to the Intune admin center > Devices > Configuration.
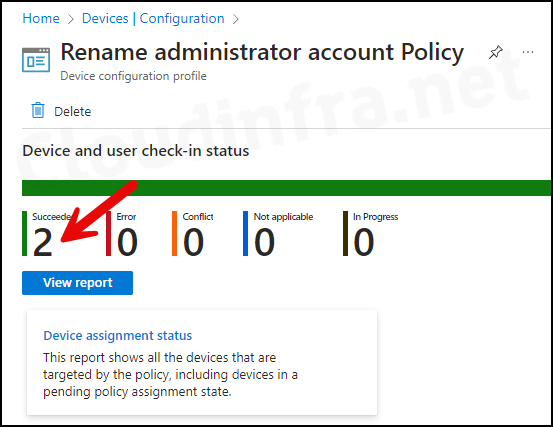
- Choose the Device Configuration profile you want to work with, and at the top of the page, you’ll see a quick view of the Success, Failure, Conflict, Not Applicable, and In Progress status.
- Click on View report to access more detailed information.
End User Experience
- Press the Windows key + R to open the Run dialog box.
- Type
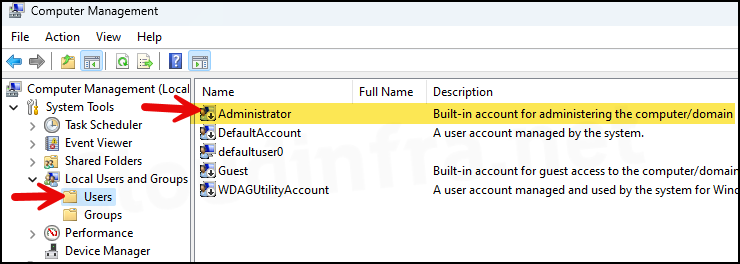
compmgmt.mscand press Enter to open the Computer Management window. - Under System Tools > Local Users and Groups > Users, you will find the built-in Administrator account.
By default, on Windows devices, administrator account is disabled. Even after you rename it, it will remain disabled.
Troubleshooting
In the majority of cases, renaming an administrator account have no issues. However, if you have applied this policy, and it’s still not renamed, even after Intune default refresh interval, you can follow below troubleshooting steps:
Check Event Viewer Logs
- Press the Windows key + R to open the Run dialog box.
- Type
eventvwrand press Enter to open the Event viewer. - Navigate to Application and Services Logs > Microsoft-Windows-DeviceManagement-Enterprise-Diagnostics-Provider/Admin.
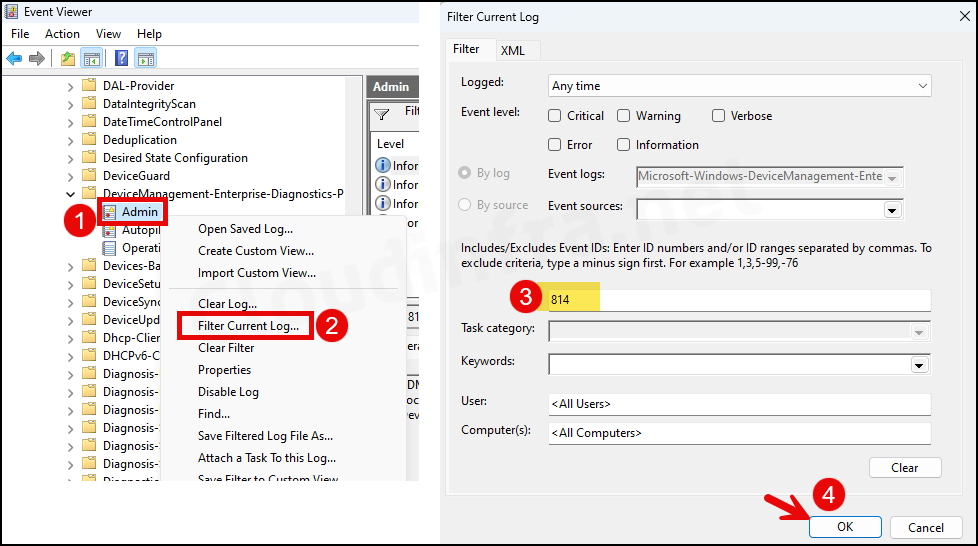
- Right-click on the Admin folder and click on Filter Current Log…
- Enter 814 in the Event ID box and click on OK.
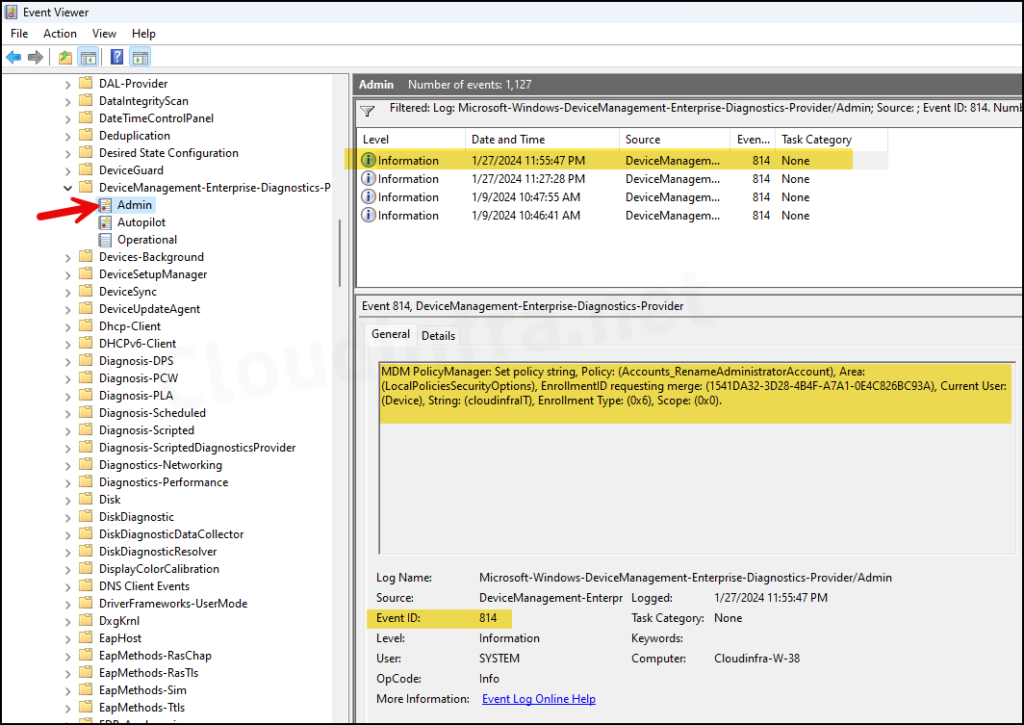
- You can locate all logs related to Event ID 814. Check them one by one until you identify the deployed configuration policy. As you can see from below screenshot, It shows the event of the policy we deployed and confirms that the account is renamed to cloudinfraIT.
MDM PolicyManager: Set policy string, Policy: (Accounts_RenameAdministratorAccount), Area: (LocalPoliciesSecurityOptions), EnrollmentID requesting merge: (1541DA32-3D28-4B4F-A7A1-0E4C826BC93A), Current User: (Device), String: (cloudinfraIT), Enrollment Type: (0x6), Scope: (0x0).
Event ID 814 related to Accounts_RenameAdministratorAccount CSP
Check Windows Registry Editor
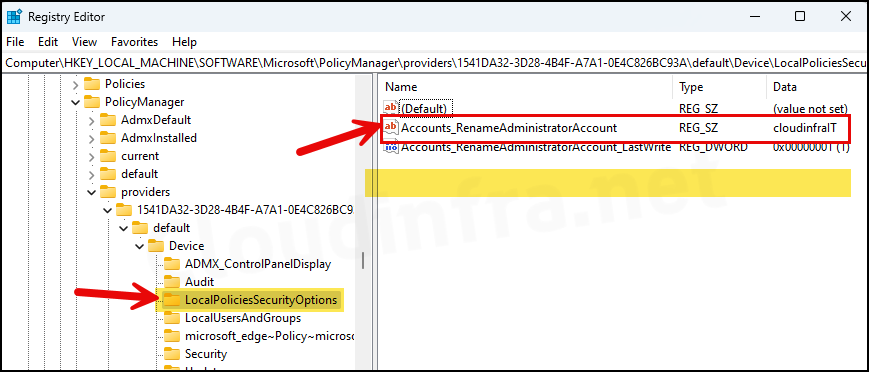
Check if Accounts_RenameAdministratorAccount is set to the new Administrator account name in Windows registry.
- Press the Windows + R keys to open the Run dialog box.
- Type
regeditand press Enter to open the Registry Editor. - Navigate to HKEY_LOCAL_MACHINE\SOFTWARE\Microsoft\PolicyManager\providers\<Administrator GUID>\default\Device\LocalPoliciesSecurityOptions.
Replace Administrator GUID with the GUID of the Administrator account on your device. If you are unsure about it, a simple trick is to right-click the providers folder and search for your custom administrator account name, which is cloudinfraIT in this case. This will automatically open the registry key that we want to navigate to.
Excellent explanation about the policy, there is only one doubt that I have not been able to solve, how do I activate the account that we have just renamed?
You can enable a built-in administrator account using Intune. Please refer to the step-by-step guide: https://cloudinfra.net/enable-disable-built-in-administrator-account-using-intune/