There are different troubleshooting steps to Fix Autopilot Profile Status Shows Not Assigned issue. This happens after you upload its hardware hash in Intune for autopilot registration.
After you create an Autopilot deployment profile, it’s assigned to the Entra security group. This group should contain the devices that you have registered with Autopilot. To ensure that the Autopilot deployment profile is assigned to the device, follow the below steps:
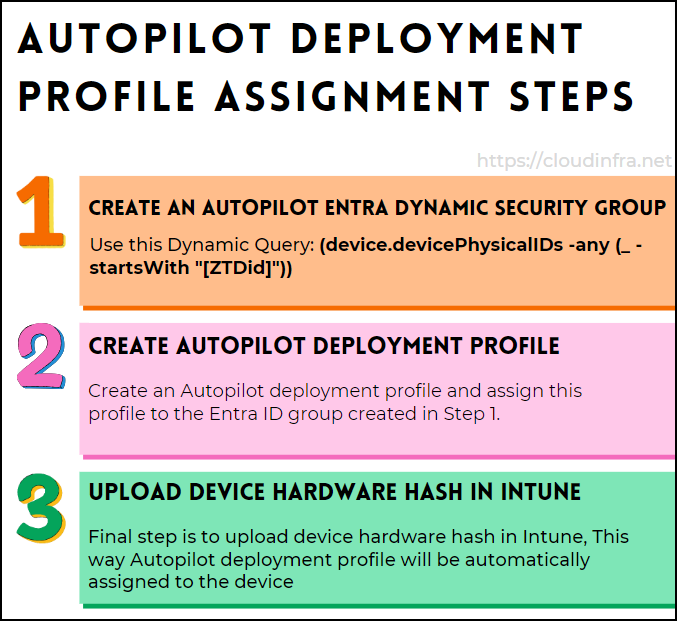
- Create an Autopilot Entra Dynamic security group: It is recommended to create a dynamic Entra Security group that automatically adds devices with attributes classifying them as Autopilot devices when their hardware hash is uploaded in Intune. Use the dynamic Query: (device.devicePhysicalIDs -any (_ -startsWith “[ZTDid]”))
- Create an Autopilot Deployment Profile: The next step is to create an Autopilot deployment profile and assign it to the dynamic Entra security group we created in the previous step.
- Upload Device Hardware Hash in Intune: You can use the CSV file or the MS Graph API to upload the device hardware hash in Intune for Autopilot registration. The device will automatically be added to the dynamic group, and the Autopilot deployment profile will be assigned.
Please note that after you upload the device’s Hardware hash in Intune, it may take around 15 minutes to import. You can click the Refresh button to check if the device has been successfully imported.
If the device has been added to the dynamic group, and the Autopilot deployment profile targets this dynamic group, the profile status column should reflect and show Assigned. However, this process gets stuck in a few cases, and the profile status column shows as Not Assigned.
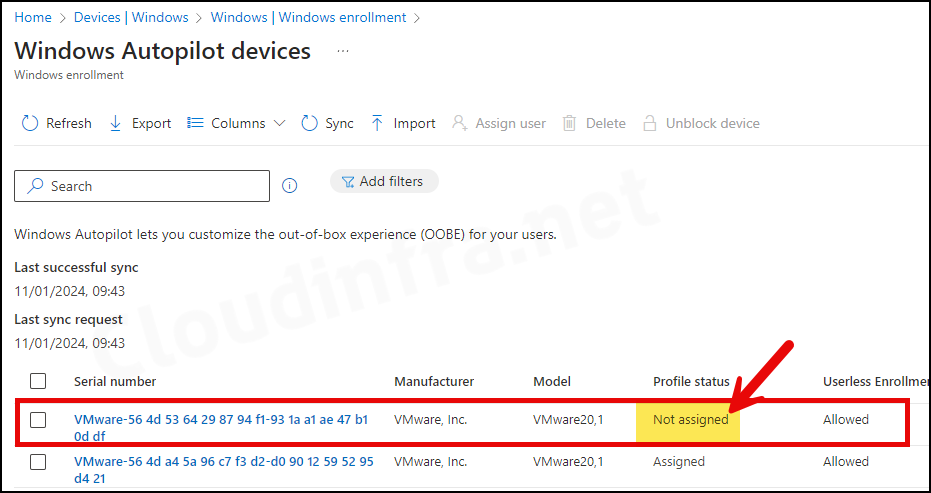
Usually, if everything is configured correctly, the status should change to Assigned automatically. However, if after waiting a few hours, you find that the profile status column shows Not Assigned, then we need to investigate and find a fix.
Contents
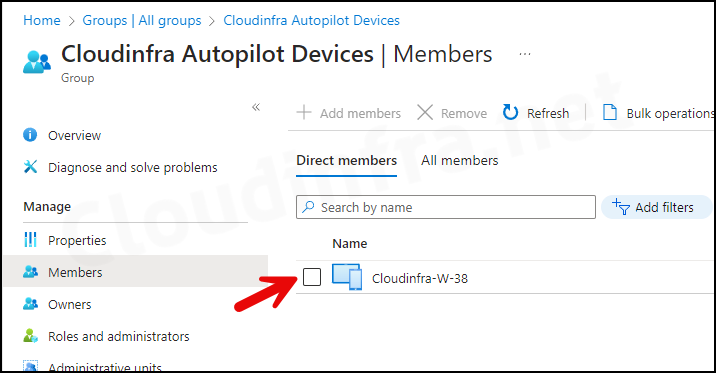
Fix 1: Ensure the Device is Part of Entra Security Group
As explained in the previous section of this blog post, the Autopilot Deployment profile is assigned to the Entra Security group; check the group membership and ensure the device is part of this group.
Fix 2: Remove the Device from Autopilot and Re-import
If the device is part of the group where the Autopilot deployment profile is assigned, the profile status column still shows as Not Assigned. You can try deleting the device from Autopilot and re-importing its hardware hash.
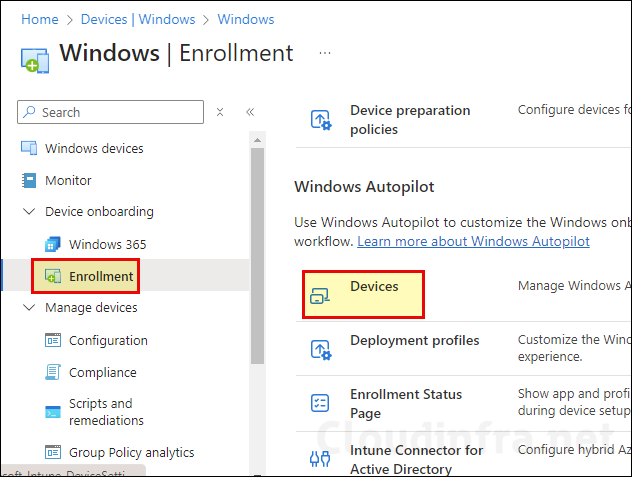
- Sign in to the Intune admin center > Devices > Enrollment > Click on Devices under Windows Autopilot section.
- Select the Device having Issues and then click the Delete button at the top to delete it.
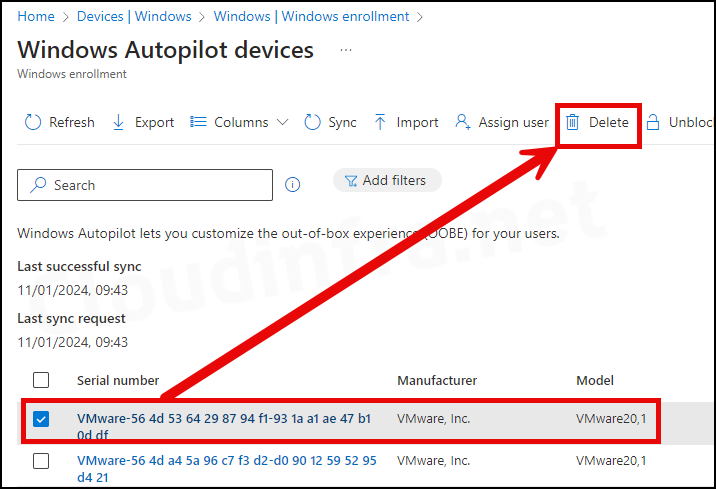
- Select Yes to delete the device from Autopilot.
If you click on Yes to delete the device, it will only be deleted from Windows Autopilot. Any other device registration in Intune or Entra ID is not affected. You can re-import the device hardware hash when you want to manage the device by Autopilot again.
Note

It may take up to 15 minutes for the device to be deleted from Autopilot. Once removed, you can import it again by clicking the Import option in the Menu bar. Refer to my other step-by-step autopilot guide, specifically Steps 8 and 9, which explain how to capture and import the hardware hash in Autopilot.
Once you import the device, you can add it to the Autopilot Entra Security group to which the Autopilot deployment profile has been assigned. Wait for another 15–20 minutes, and the Profile status column should show as Assigned.
Fix 3: Force Autopilot Deployment Profile Assignment from Microsoft 365 admin center
If previous solutions have not worked for you, you can try to force assign the Autopilot deployment profile using the Microsoft 365 admin center.
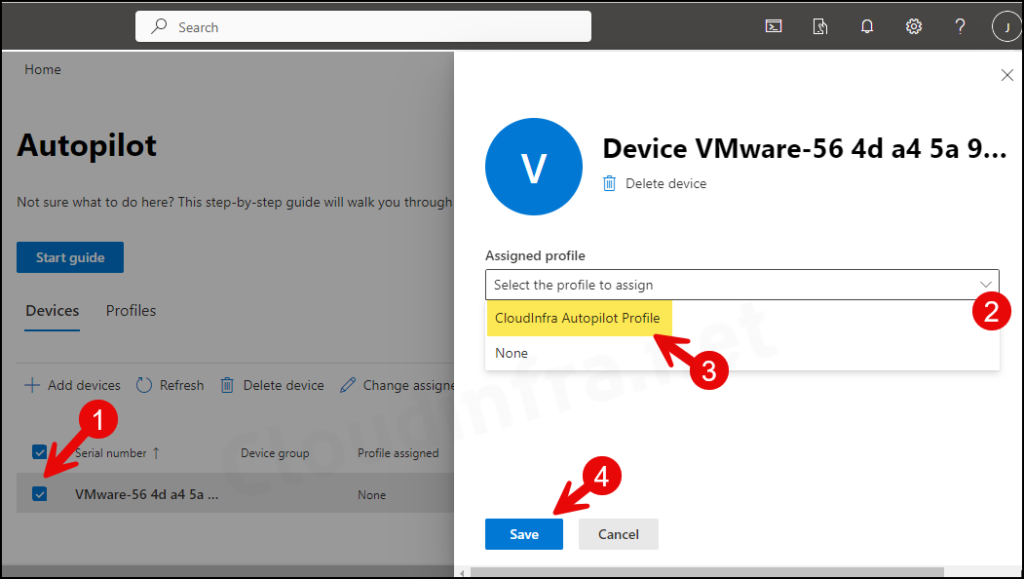
- Go to https://admin.microsoft.com/#/PrepareWindows.
- Select the device and, using the drop-down for Assigned profile, click on the Autopilot deployment profile you want to assign to the device.
- Click on Save to complete this change.
After clicking the Save button, this profile will be assigned slowly, eventually appearing under the Profile assigned column on the M365 admin center.
Fix 4: Check for Autopilot Policy Conflicts
Multiple policies are created and can be targeted to a single device on the Intune admin center, which could cause conflicts in policies. If you have confirmed that the device is part of the Autopilot group, you must check for policy conflicts.
To resolve all the policy conflicts, follow the guidelines, which are available on the Microsoft docs link: Windows Autopilot-Policy Conflicts. Once the conflicts are resolved, you can re-check the device’s Autopilot Deployment profile assignment status to confirm if it has been assigned now.